|
Networking Drivers
|
|
1 |
Ralink USB(RT2870 / RT2770 / RT307X / RT2070 / RT357X / RT3370 /
RT8070 / RT537X) for Windows
Version:
2K/XP:3.2.4.0
Vista:3.2.4.0
Win7:3.2.4.0
OS:
XP 32/64,
Vista 32/64,
Win7 32/64
Date Release: 09/15/2011
Ralink RT2870 / RT2770 / RT307X /
RT537X) for Mac
10.5/10.6/10.7
Date Release: 10/21/2011
Version: V4.1.8.0
RT8070/RT3070/RT3370/RT5370/RT5372 USB for Linux
Date update: 3/28/2012
Version: 2.5.0.3 |
For Part#/Model:
PL-H5DN-3070 (WiFi-N)
PT-H9DN (Max Distance)
PT-H9DN-ROC(Max Distance Outdoor).
PL-2712N (Outdoor Plus)
PL-18N (Hermes)
PT-H5DN-1W (Speedy)
PT-H10DN-1W (Speedy2)
HT-H5DN (HornetTek)
PL-GM5 (GM5)
PL-U2N (NanoN)
PL-U2NA |
|
2 |
Realtek RTL8188SU
Realtek
RTL8188SU Utility and Driver Auto Installation Program (Support
Win2K/XP/Vista/Win7) (18MB)
Linux driver for Kernel 2.6.x (1819K) |

For Part#/Model:
PL-150N (N150)
PT-2223N
(May/2010 after version)
|
|
3 |
Realtek RTL8191SU
Utility and Driver Auto Installation Program (Install Shield
v1.00.0175)
Date Release: 12/17/2010
Version: 1086.38
Realtek_RTL8188/8191/8192SU For
Linux,
MAC OS
10.4, MAC OS
10.5,
MAC OS
10.6 |
 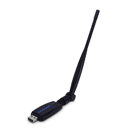
For Part#/Model:
PT-H5DN (POWERLINK)
PL-U3005N (POWERLINK)
HT-H5DN8191 (HornetTek)
PT-H5D-11N (Generic) |
|
4 |
Realtek RTL8192SU
Win2K/XP/Vista/Win7
Utility and Driver Auto Installation Program (Install Shield
v1.00.0175)
Date Release: 12/17/2010
Version: 1086.38 |
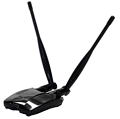
For Part#/Model:
HT-H10DN (Janus) |
|
5 |
Realtek_RTL8188/8191/8192SU For
Linux,
MAC OS
10.4, MAC OS
10.5,
MAC OS
10.6
|
|
|
6 |
Ralink 11n USB adapter installation
driver for
all
Windows |

PT-2223N
(May/2010 before version) |
|
7 |
Realtek RTL8187B
UI Package and Driver (Support XP/Vista/Win7)
MAC OSX 10.4 Install Package (UI ver.1.5.7)
MAC OSX 10.5 Install Package (UI ver.1.5.7) |
|
|
8 |
Realtek
RTL8187L
UI Package and driver auto installation package (support
WinXP/Vista)
Window 7 Installation Package
UI Package and driver (support WinXP/Vista)
Linux driver for kernel 2.6.X
MAC OSX 10.4 Driver Package (UI ver. 1.5.7)
MAC OSX 10.5 Driver Package (UI ver. 1.5.7) |
For Part#/Model:
PT-H5D
PT-H7D
XS-2223-BK
PT-2212PU-1W |
|
9 |
Ralink 2571 Drive for Window, Mac
and Linux |
For Part#/Model:
PT-H9D-ROC-1W |
|
10 |
BT4 CD |
|
|
11 |
BT5 CD,
BT5
Manual (Beini) |
For Ralink RL3070 Chipset |
|
12 |
Powerlink GM5: For Window and Mac
Driver, please see #1 above.
GM5
Driver,
QIG,
Manual
i-Smith
Driver and
Manual (bonus utility software) (only compatible with GM5)
What is the Turbo Booster?
Download Free
Turbo Booster (only
compatible with GM5) |
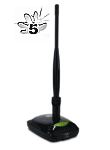
For Part#/Model:
PL-GM5/GM5 |
|
13 |
Realtek RTL8188CUS
See software download
here |
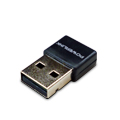 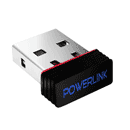
For Part#/Model:
PL-8188CUS/MicroN
PL-8188n/miniN |
|
14 |
PowerLink PL-CPE-22N CPE / PL-APN
AP to Client
Setup Guide (Power Point)
WDS
Setup Guide
(repeater) |
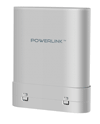 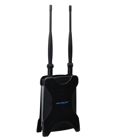
For Part#/Model:
PL-CPE-22N
PL-APN |
|
15 |
Grid antenna completed installation pictures
1,
2,
3.
For tilt:
4,
5.
See manual here |
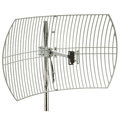 |
|
16 |
Default IP: 192.168.16.254
Please read the
Manual for the Operation modes.
AP mode: 1, Exchange wireline to wireless. 2, Use as repeater/relay
Router mode: Connect to a modem.
Client mode: Connect travel router to PC using the included Ethernet
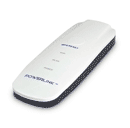
cable. It uses as a wireless LAN card. |
 |
Firmware / Manual / QIG
/
|
|
1 |
802.11n 2T2R Router/CPE firmware
(rar file, 2mb) (Zip
file here) (2/24/2012 update)
Internal Web Utility
Default IP: 192.168.1.254
Note: there is no new firmware for
V1.4
Check your version before update.
See Management-->Status in the Internal Web Utility |
 
For Part#/Model:
PL-APN/Boost N
PL-CPE-22N/CPE |
|
2 |
PL-APN High Power AP Router Quick Installation Guide
(PDF)
Default IP: 192.168.1.254
WDS and WISP Setup Guide |

For Part#/Model:
PL-APN/Boost N |
|
3 |
PowerLink PL-CPE-22N CPE
Default IP: 192.168.1.254
WDS
Setup Guide
Also see the AP
WDS and WISP Setup |

For Part#/Model:
PL-CPE-22N |
|
4 |
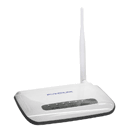
AP2402 AP Router
User Manual
(PDF 6.1mb)
Quick Installation Guide
(PDF 1.8mb)
AP2402 Firmware V1.1.229 (update 08/17/2012)
Default IP: 192.168.1.1
User name: guest
Password: guest
Repeater setup guide |
For Part#/Model:
PT-AP2402/AP2402 |
|
5 |
TP-185/TP-215 Touch Screen Panel
Disc file (6mb) |

For Part#/Model:
TP-185/TP-215 |
|
|
|
Problem for weak signal
The LED on the
booster indicates the AP radio transmitting status.
If there is no led on, it means there is no AP radio
signal input,
therefore no signal has
been amplified by the booster. Try and check the DC
power adapter or SMA connector cable is connected
right with PCI WLAN card. Power on the PC and see if
the LED is blinking or not. Also, it is probably TX
circuit is defective if LED is still not blinking at
all. Another situation is that radio has strong
radio signal but can not ping back at all which
means Rx circuit is defective. In case of defect
found, please send back for replacement.
|
 |
|
CPE2615/CPE-3014
manual
and
quick guide |
 |
|
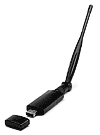
Wibee XS-2204 and PT-H5D
RTL8187L
driver |
  |
|
HornetTek HT-2223BK and
XS-2223 23dBm RTL8187B
Driver V1,
Driver V2.
and
manual |
 |
|
| |
|
Bluetooth |
|
1 |
Bluetooth Printer Adapter BT-0260-V2
Driver CD (rar file 4.1mb) |
 |
|
2 |
BlueTooth Wireless Dongle
100 Meters Range GP-BT-02 |
 |
|
3 |
Clicker BT mouse
BT600 manual (PDF) |
 |
|
|
|
CardBus/ExpressCard Adapter |
|
For CardBus adapter, user
needs to have the extra power sources from provide USB cable for better
solution. |
|
|
|
|
| |
|
|
Trouble Shooting |
|
Network Drive
Lan Drive
3.5" Enclosure
- USB or Ethernet not working?
USB and Ethernet can't connect at the same time. If connect both
USB and Ethernet, the Ethernet will not work, so you need to
unplug USB port. Please note that USB is only for downloading
and uploading files.
- You must format the HDD using
only administrative through Ethernet, not through USB.
- Download the firmware first
here
- Please note the Lan Drive needs
to be format to FAT32, and each partition can't be more than
32GB, so if you have 320GB hard drive, you probably want to make
10 partitions. Also, if you going to to transfer fire to
the Lan Drive, each file limit is 4GB. These are couple limits
for the Lan Drive. It doesn't function if you fail to follow all
of the limits above.
|
|
HDD Enclosure
I install a 40 GB Hard Drive with the
enclosure, but my computer detect it but not showing an additional
drive under my computer icon. How do I get it to work?
Answer: For XP, please go to
control panel-->Administrative tools-->Computer Management. Under
"Computer Management," click "Disk Management," then check the
right-bottom window (scrolling down if necessary), you should see
the additional hard drive disk, right click mouse on it, choose "new
partition", then follow the instructions for the format of the hard
drive. After finishing the format, you should be able to see the
additional drive under my computer icon on the desktop.
Still not working? Try on another
computer, and see if other computer detects the new hardware. Also,
please download the USB 2.0 service pack from
www.microsoft.com.
illustration for how to format for
PC
Answer for
Mac
|
|